8-获取区域颜色和判断桌宠本体
1182
0
2023-07-08
2023-07-18
Hey、小怪兽
- • 上一节介绍了如何增加鼠标事件,这节主要介绍如何获取canvas的颜色和判断桌宠本体
- • 如图所示,其实红色框框是一个大的canvas,除了蓝色的区域,其他的地方都是透明的

- • 本来我是想,这是一个canvas的话,直接用方法getContext("2d")获取canvas的上下文,后面就可以直接拿到颜色
- • 但是!发现一个问题,Pixi.js它绘制的时候是用WebGL,而WebGL没办法用getContext("2d")这个方法,我查询了Pixi.js文档没看到有获取透明区域或鼠标点击区域颜色的方法
- • 只能用一个最笨的方法了,这是我之前的HTML代码(/src/index.html),桌宠的动画是画在id叫taro-canvas上的:
-
<div id="taro-pet" class="taro-pet"> <canvas id="taro-canvas"></canvas> </div> - • 这里做个修改,加一个canvas,我给它的id改成shadow-canvas:
-
<div id="taro-pet" class="taro-pet"> <canvas id="taro-canvas"></canvas> <canvas id="shadow-canvas"></canvas> </div> - • 在/src/public/css/index.css里修改一下CSS,这个canvas是不显示的,而且是在动画canvas下面:
-
#shadow-canvas { position: absolute; z-index: -1; opacity: 0; } - • 来到渲染进程/src/_renderer/renderer.js修改一下shadow-canvas的大小:
-
// 虚拟的canvas let shadow_canvas = null; shadow_canvas = document.getElementById("shadow-canvas"); shadow_canvas.width = bower_width; shadow_canvas.height = bower_height; - • 鼠标移动需要获取到当前这一帧的动画贴图,比方说桌宠在做欢呼的动作,它会改变自己的位置,这个时候就需要获取当前这一帧的动作的贴图
- • 我是直接把动画打印出来一层一层找到的,其实就在anim.texture.baseTexture.resource.source里,可以打印出来看看:
-
// 鼠标移动事件 anim.on("mousemove", (event) => { const global_position = event.data.global; const local_position = anim.toLocal(global_position); // 当前这一帧的动画贴图 const anim_img = anim.texture.baseTexture.resource.source; console.log('anim.texture.baseTexture.resource', anim.texture.baseTexture.resource) }); - • 之前说过了,这个Pixi.js可以一帧一帧播放图片来制作动画,移动下鼠标,可以看到已经获取到当前帧的贴图,而source就是贴图的资源:

- • 接着要写一个方法,这个方法需要传入三个参数:
- - x:就是鼠标点击的x坐标
- - y:就是鼠标点击的y坐标
- - img:当前播放帧的动画贴图
- • 刚才创建的shadow-canvas,获取到上下文后,再把贴图绘制到上面,通过getImageData的方法传入点击的x和y就可以拿到颜色了,最后返回颜色值
-
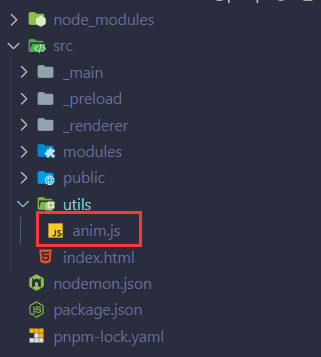
// 给canvas一个原型方法,构建虚拟canvas用来获取canvas上某个点的颜色 export const get_pixel_color_func = (x, y, img) => { // 虚拟canvas const shadow_canvas = document.getElementById("shadow-canvas"); // 通过canvas自带的方法获取上下文 const context = shadow_canvas.getContext("2d"); // 先清除画布 context.clearRect(0, 0, shadow_canvas.width, shadow_canvas.height); // 绘制传入的图片,这个图片就是动画的某一帧 context.drawImage(img, 0, 0); // 获取该点像素数据 const image_pixel_data = context.getImageData(x, y, 1, 1); let pixel = image_pixel_data.data; // 返回rgba颜色值 let r = pixel[0]; let g = pixel[1]; let b = pixel[2]; let a = pixel[3] / 255; a = Math.round(a * 100) / 100; let rHex = r.toString(16); r < 16 && (rHex = "0" + rHex); let gHex = g.toString(16); g < 16 && (gHex = "0" + gHex); let bHex = b.toString(16); b < 16 && (bHex = "0" + bHex); const rgbaColor = "rgba(" + r + "," + g + "," + b + "," + a + ")"; const rgbColor = "rgb(" + r + "," + g + "," + b + ")"; const hexColor = "#" + rHex + gHex + bHex; return { rgba: rgbaColor, rgb: rgbColor, hex: hexColor, r: r, g: g, b: b, a: a, }; }; - • 在utils下创建anim.js,放置动画的方法,把上面的方法写在这里/src/utils/anim.js:
- • 最后在渲染进程/src/_renderer/renderer.js,导入方法:
-
// 导入方法 import { get_pixel_color_func } from "../utils/anim.js"; - • 使用方法:
-
// 鼠标移动事件 anim.on("mousemove", (event) => { const global_position = event.data.global; const local_position = anim.toLocal(global_position); // 当前这一帧的动画贴图 const anim_img = anim.texture.baseTexture.resource.source; const color = get_pixel_color_func(local_position.x, local_position.y, anim_img) console.log('color', color.rgba) }); - • 在终端pnpm start,可以看到shadow-canvas就在绘制的桌宠下面:

- • 随便移动一下鼠标,就可以获取颜色了,rgba(0,0,0,0)说明鼠标在透明区域移动,如果有值说明移动到了本体:

- • /src/index.html完整代码:
-
<!DOCTYPE html> <html lang="en"> <head> <meta charset="UTF-8"> <meta name="viewport" content="width=device-width, initial-scale=1.0"> <title>TaroPet</title> <link rel="stylesheet" href="./public/css/index.css" /> </head> <body> <div id="taro-pet" class="taro-pet"> <canvas id="taro-canvas"></canvas> <canvas id="shadow-canvas"></canvas> </div> <script src="./public/js/pixi.min.js"></script> <script src="./_renderer/renderer.js" type="module"></script> </body> </html> - • /src/public/css/index.css完整代码:
-
* { padding: 0; margin: 0; box-sizing: border-box; } html, body { width: 100vw; height: 100vh; overflow: hidden; } .taro-pet { width: 100vw; height: 100vh; transform: scaleX(-1); } #shadow-canvas { position: absolute; z-index: -1; opacity: 0; } - • /src/utils/anim.js完整代码:
-
// 给canvas一个原型方法,构建虚拟canvas用来获取canvas上某个点的颜色 // 传入三个参数,点击的x坐标和y坐标,img对象 export const get_pixel_color_func = (x, y, img) => { // 虚拟canvas const shadow_canvas = document.getElementById("shadow-canvas"); // 通过canvas自带的方法获取上下文 const context = shadow_canvas.getContext("2d"); // 先清除画布 context.clearRect(0, 0, shadow_canvas.width, shadow_canvas.height); // 绘制传入的图片,这个图片就是动画的某一帧 context.drawImage(img, 0, 0); // 获取该点像素数据 const image_pixel_data = context.getImageData(x, y, 1, 1); let pixel = image_pixel_data.data; // 返回rgba颜色值 let r = pixel[0]; let g = pixel[1]; let b = pixel[2]; let a = pixel[3] / 255; a = Math.round(a * 100) / 100; let rHex = r.toString(16); r < 16 && (rHex = "0" + rHex); let gHex = g.toString(16); g < 16 && (gHex = "0" + gHex); let bHex = b.toString(16); b < 16 && (bHex = "0" + bHex); const rgbaColor = "rgba(" + r + "," + g + "," + b + "," + a + ")"; const rgbColor = "rgb(" + r + "," + g + "," + b + ")"; const hexColor = "#" + rHex + gHex + bHex; return { rgba: rgbaColor, rgb: rgbColor, hex: hexColor, r: r, g: g, b: b, a: a, }; }; - • /src/_renderer/renderer.js完整代码:
-
// 导入方法
import { get_pixel_color_func } from "../utils/anim.js";
// 当前使用的模型
let current_module = "kkr";
// 初始配置和动作配置
let init_config = null;
// 初始动画
let anim_normal = null;
// 动画的舞台
let app = null;
// 动画的canvas
let anim_canvas = null;
// 虚拟的canvas
let shadow_canvas = null;
// 获取窗口的大小
const bower_width = window.innerWidth;
const bower_height = window.innerHeight;

// 页面加载完成执行
window.addEventListener("load", async (event) => {
    // 获取配置
    const module = await import(`../modules/${current_module}/${current_module}.js`);
    init_config = module.init_config;

    // 赋值canvas
    anim_canvas = document.getElementById("taro-canvas");
    shadow_canvas = document.getElementById("shadow-canvas");
    shadow_canvas.width = bower_width;
    shadow_canvas.height = bower_height;

    // 动画舞台配置
    app = new PIXI.Application({
        view: anim_canvas,
        width: bower_width,
        height: bower_height,
        backgroundAlpha: 0,
        resolution: 1,
    });
    // 添加给div-taropet元素
    document.getElementById("taro-pet").appendChild(app.view);


    // 先把初始的动画加载完成
    anim_normal = await create_anim_func(init_config[0]);
    anim_normal.play();
    app.stage.addChild(anim_normal);
});

// 创建动画的方法
const create_anim_func = async (obj) => {
    // 存放文件前缀, 文件格式(png,jpg)
    const file_prefix = "./modules";
    const file_format = ".png";
    const { name, frames, object } = obj;
    const texture_array = [];
    // 通过帧数循环获取贴图
    for (let i = 0; i < frames; i++) {
        const num = `000${i}`.slice(-3);
        // texture_name ./modules/kkr/normal/001.png
        const texture_name = `${file_prefix}/${current_module}/${name}/${num}${file_format}`;
        const texture = await PIXI.Texture.from(texture_name);
        texture_array.push(texture);
    }
    // 生成动画,配置动画属性
    const anim = new PIXI.AnimatedSprite(texture_array);
    anim.name = name;
    anim.animationSpeed = 0.5;
    anim.loop = object.loop;

    // 设置交互模式
    anim.eventMode = "dynamic";

    // 鼠标移动事件
    anim.on("mousemove", (event) => {
        const global_position = event.data.global;
        const local_position = anim.toLocal(global_position);
        // 当前这一帧的动画贴图
        const anim_img = anim.texture.baseTexture.resource.source;
        const color = get_pixel_color_func(local_position.x, local_position.y, anim_img)
        console.log('color', color.rgba)
    });
    // 鼠标左键点击事件
    anim.on("click", (event) => {
        const global_position = event.data.global;
        const local_position = anim.toLocal(global_position);
        console.log('鼠标左键点击:', local_position)
    });
    // 鼠标点击右键事件
    anim.on("rightclick", (event) => {
        const global_position = event.data.global;
        const local_position = anim.toLocal(global_position);
        console.log('鼠标右键点击:', local_position)
    });

    return anim;
};